Showing posts with label DIY. Show all posts

Monday, August 29

not leaving, just moving

One of my (much) earlier white waxflower blog titles was "Ch-Ch-Ch-Changes" after everyone's favorite David Bowie song. Had I not already used it, that might have been the perfect title for this post.


My furniture-decor-party-refurbishing-graphic design, etc. business has grown from something I did on the side for fun to something that keeps me so busy I can barely keep up ... in a good way! I've loved blogging white waxflower, but I simply don't have time for it anymore. It only costs me $10 a year to keep this site up and running, so I'll leave it up for a year or so for those of you who might want to look up an old craft project or something:)


But as the title of this post says, I'm not leaving, just moving:) Check me out RIGHT HERE at my brand-new, not-even-close-to-finished business site, where there's already a fun and simple little craft tutorial:) See you there!


Wednesday, July 13

a year later: the guest bedroom is finally just how I want it


 I'm breaking from my usual tradition of updating along the way of a room re-do, and going straight to the finished product pictures. The guest bedroom is finally, finally ..... FINALLY finished!  And I am so happy. See the pillows in the photo above? I dyed them myself:)


I bought a cheapo bedskirt from Target and dyed it as well in a stripey, splattery pattern.


This project inspired me to start collecting color samples by dipping card stock in paint, coffee,  or whatever else I think is a pretty color and something I might like to remember. Weird, I know, but I like it!


Just about the only thing in the room that hasn't changed is the location of the bookcase and Picasso prints above it. 


The credenza on the right I built myself. It has a loooooong way to go before it's all done, but it already provides a great work surface and tons of storage. See the giant gold knobs? I made them out of mason jar tops:)


This picture of me and my mama was my inspiration for the big blue painting on the far right. I put the canvas on a wall and used the projector to trace the image, and then embellished it with shades of blue paint.


I'm finally content with the room, and I don't think I'll be changing it for a long time. I hope you enjoyed the reveal, even though you didn't have to wait for it!

Wednesday, July 6

an end table make-over and an upholstery decision


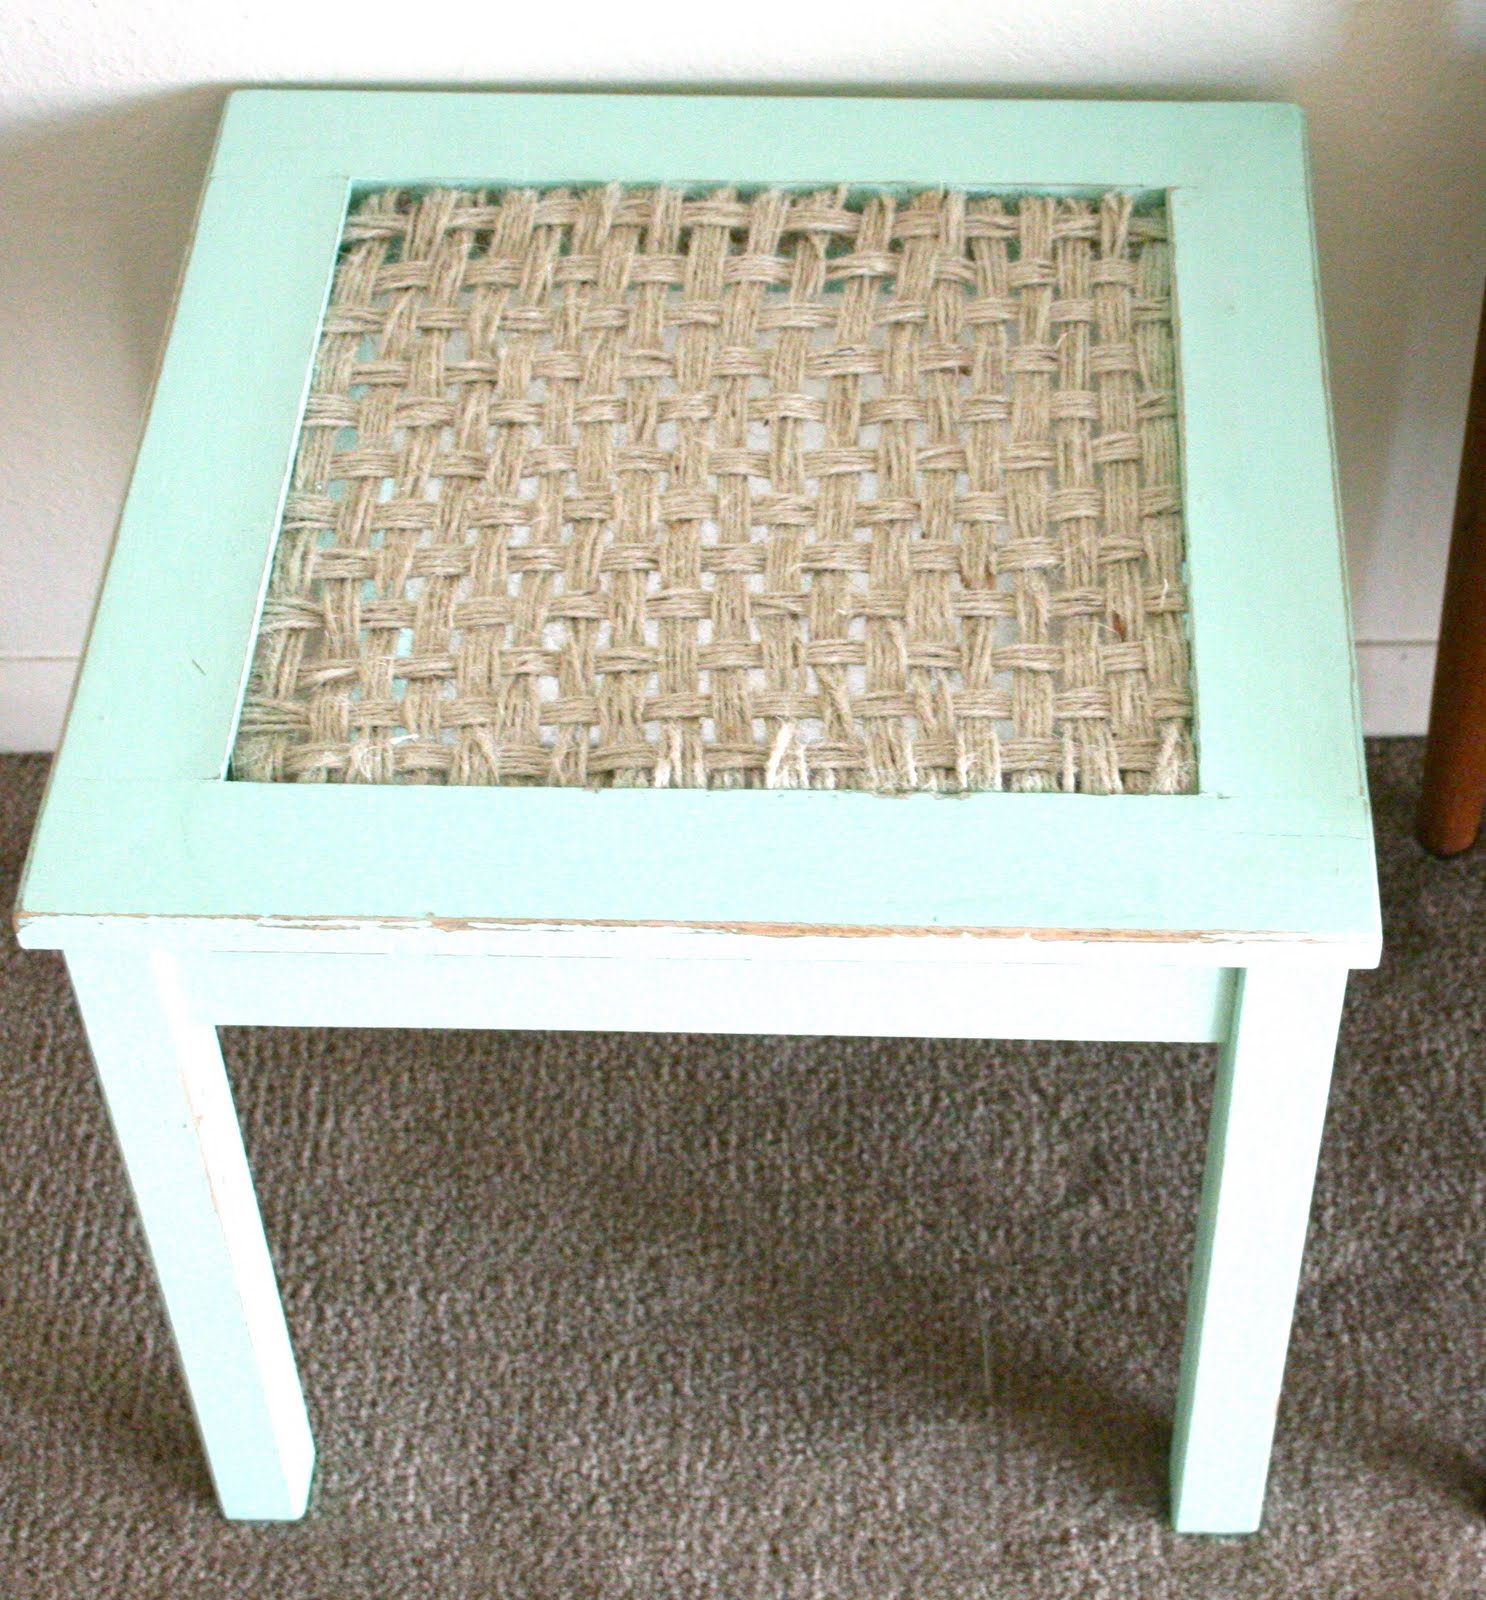
This little fella is another one of my roadside-rescue projects. I didn't let the fact that I was out jogging and the top of the table was completely missing stop me from snatching it up and taking it home!


I've been experimenting a lot lately with what I like to call "mixed-media furniture", so weaving a top for the end table made for great practice:) Add some sea-green paint and a bit of light distressing, and I ended up with an end table that would look right at home in a beach cottage.


And now for a before/after project that is still very much in the beginning stages. The last time you saw this half of my living room, it looked like this:


Well, I sold those chairs, and in their place we have this chair:


and this chair:


Step one was to sand the original finish off of the armchair. Time had not been good to it and it was a little rough-looking in places. I'm almost done with the sanding, then I'm going to stain it to match the chair above. The question, then, is what to do about the upholstery! I'd like to re-upholster them in matching fabric, or at least color-coordinated fabric.


Right now it's just covered in this red vintage table cloth, but I've narrowed my options for a more permanent upholstery job down to these three:


 A) Wool Blanket: Something stripey like a Hudson's Bay blanket, inspired by the chair above. The smaller chair could then be upholstered in the leftover blanket material, or in a solid fabric that matches one of the blanket's colors.


B) Neutral: This is the route I usually go with furniture, because I prefer to let the accents like pillows and throws "do the talking" (i.e. be colorful and bold). I have a lot of white linen fabric that looks similar in texture to the chair pictured above.


 C) Whimsical: I love this chair from anthropologie, and I found similar, Monet-inspired fabrics that I think would look really cool.


 It might be a little much to do both chairs in this fabric, so I'd probably just do the bigger chair in the Monet, and the smaller chair in a solid, color-coordinated fabric.


So should I go for A, B, or C?

vote! vote! vote!

Thursday, June 23


I finished the wall art I mentioned in this post! The frame I built for it is a bit wacky looking, I need to make a better one, this time with wood instead of cardboard and kraft paper. Other than that, though, I really like it:)


Next I want to make one made out of Martha Stewart paint chips, this time with a white frame.


Two of our friends are getting married this weekend, and I am the wedding coordinator! I'm having sooooo much fun doing it. Currently our house has been taken over with everything from arches (which my husband and our friend Sean built!) ...


to 52 coffee filter flowers ...


To little bride and groom paper dolls that I made myself:)


Aren't they sweet? I can't WAIT to share pictures of all the decor!


PS Jemima says hello:)


Tuesday, June 7

If I can make one, toucan make one, too!


Yikes. Sincere apologies for that pun, I don't know what came over me! Anyway ... I've proclaimed my love for Vera Neumann before, so I'll just skip over that part and go straight to the point of this post: I made a pillow, inspired by a Vera Neumann sketch of a toucan.


A while back, Anthroplogie did a Vera Neumann-inspired line of products, and the bird tray was my favorite of all the items. I've already copied that cute toucan once before ... 


I painted my own version of it and hung him in our very-hard-to-photograph downstairs bathroom.


And even though my pillow isn't 100% done (I'm having zipper issues), I thought I'd go ahead and post the how-to! Here's what you'll need:

  • glue (I used a glue gun)
  • sturdy fabric (for the pillow)
  • three assorted fabrics (for the bird)
  • about 4 squares of felt
  • scissors
  • embroidery floss
  • fabric paint (optional)
  • the normal pillow-sewing stuff
I cut my fabric squares 20"x20", and just used scraps for the bird. If you don't have any fabric scraps, you could always go buy 3 fat quarters.


I hand-drew the pattern onto the fabric for the sections of my bird, but I thought I'd do my best at making a pattern just for you guys! So don't go sayin' I never did nothin' nice for ya'll.


I made felt pom-poms for the corners of my pillow. There are already about a million tutorials online about how to make these, so I won't add another one to the mix, but basically I used 3 circles per pom, folded a strip of felt in half, doubled the circles over, scrunched them up and sewed them to the folded-over strip of felt.


My circles were about 3" across.


I painted a random square pattern on to the back of the pillow, and surrounding the bird on the front of the pillow.


I tacked the pieces of the bird down using a little hot glue, then hand-stitched around the edges using contrasting-colored embroidery floss for an extra-handmade look.


In hindsight I wish I hadn't used quite such a bold pink for the poms. I always get carried away when it comes to hot pink! But I'm still happy with how it turned out:) Now I'm hatching (pun intended) plans for a companion pillow or two.


Ta-ta for now! And wish me luck with that zipper.

Wednesday, May 25

I'm pinterested in following you

It took me forever to jump on the bandwagon, but now that I've been on it for a while, I have to say: I HEART PINTEREST!!! And no, not a cent was paid to me to sing Pinterest's praises. I just really, really heart it. Here are a few of my favorite pins:


I got this pin from my buddy Niki over world in a paper cup.


This is a vintage food mill turned into a planter.


I love everything Karla wears, but this outfit is just perfect.


DIY watering can - so smart!


how cute are these DIY poms?


line drawing of William Faulkner by my one of my current favorite artists, Jason Polan.


Love everything about this room, especially the random rope!


Are any of you on Pinterest? Leave me a comment or send me an email so I can follow you! Happy pinning:)


Monday, May 9

a tale of two shelves

These shelves were two of the very first things we put on our walls upon moving in here. They started out pretty sparse, as you can see:


Then they got a little more crowded.


And even more crowded ...


And here we have the crowded-ing-est.:


Over the weekend I took everything off of them and stained the boards a using a few coats of a light, natural stain.


I practically had to do a headstand to get this "after" shot of how they turned out!


Then I had fun filling the shelves back up:)


I added some new items and took some old items away. They're probably still a bit too busy-looking, but they're full of things we love, and I do like how much more colorful they are now.


Coming up this week at white waxflower: An OOtD, a lamp make-over, and more!