Showing posts with label vintage loves. Show all posts

Wednesday, July 6

an end table make-over and an upholstery decision


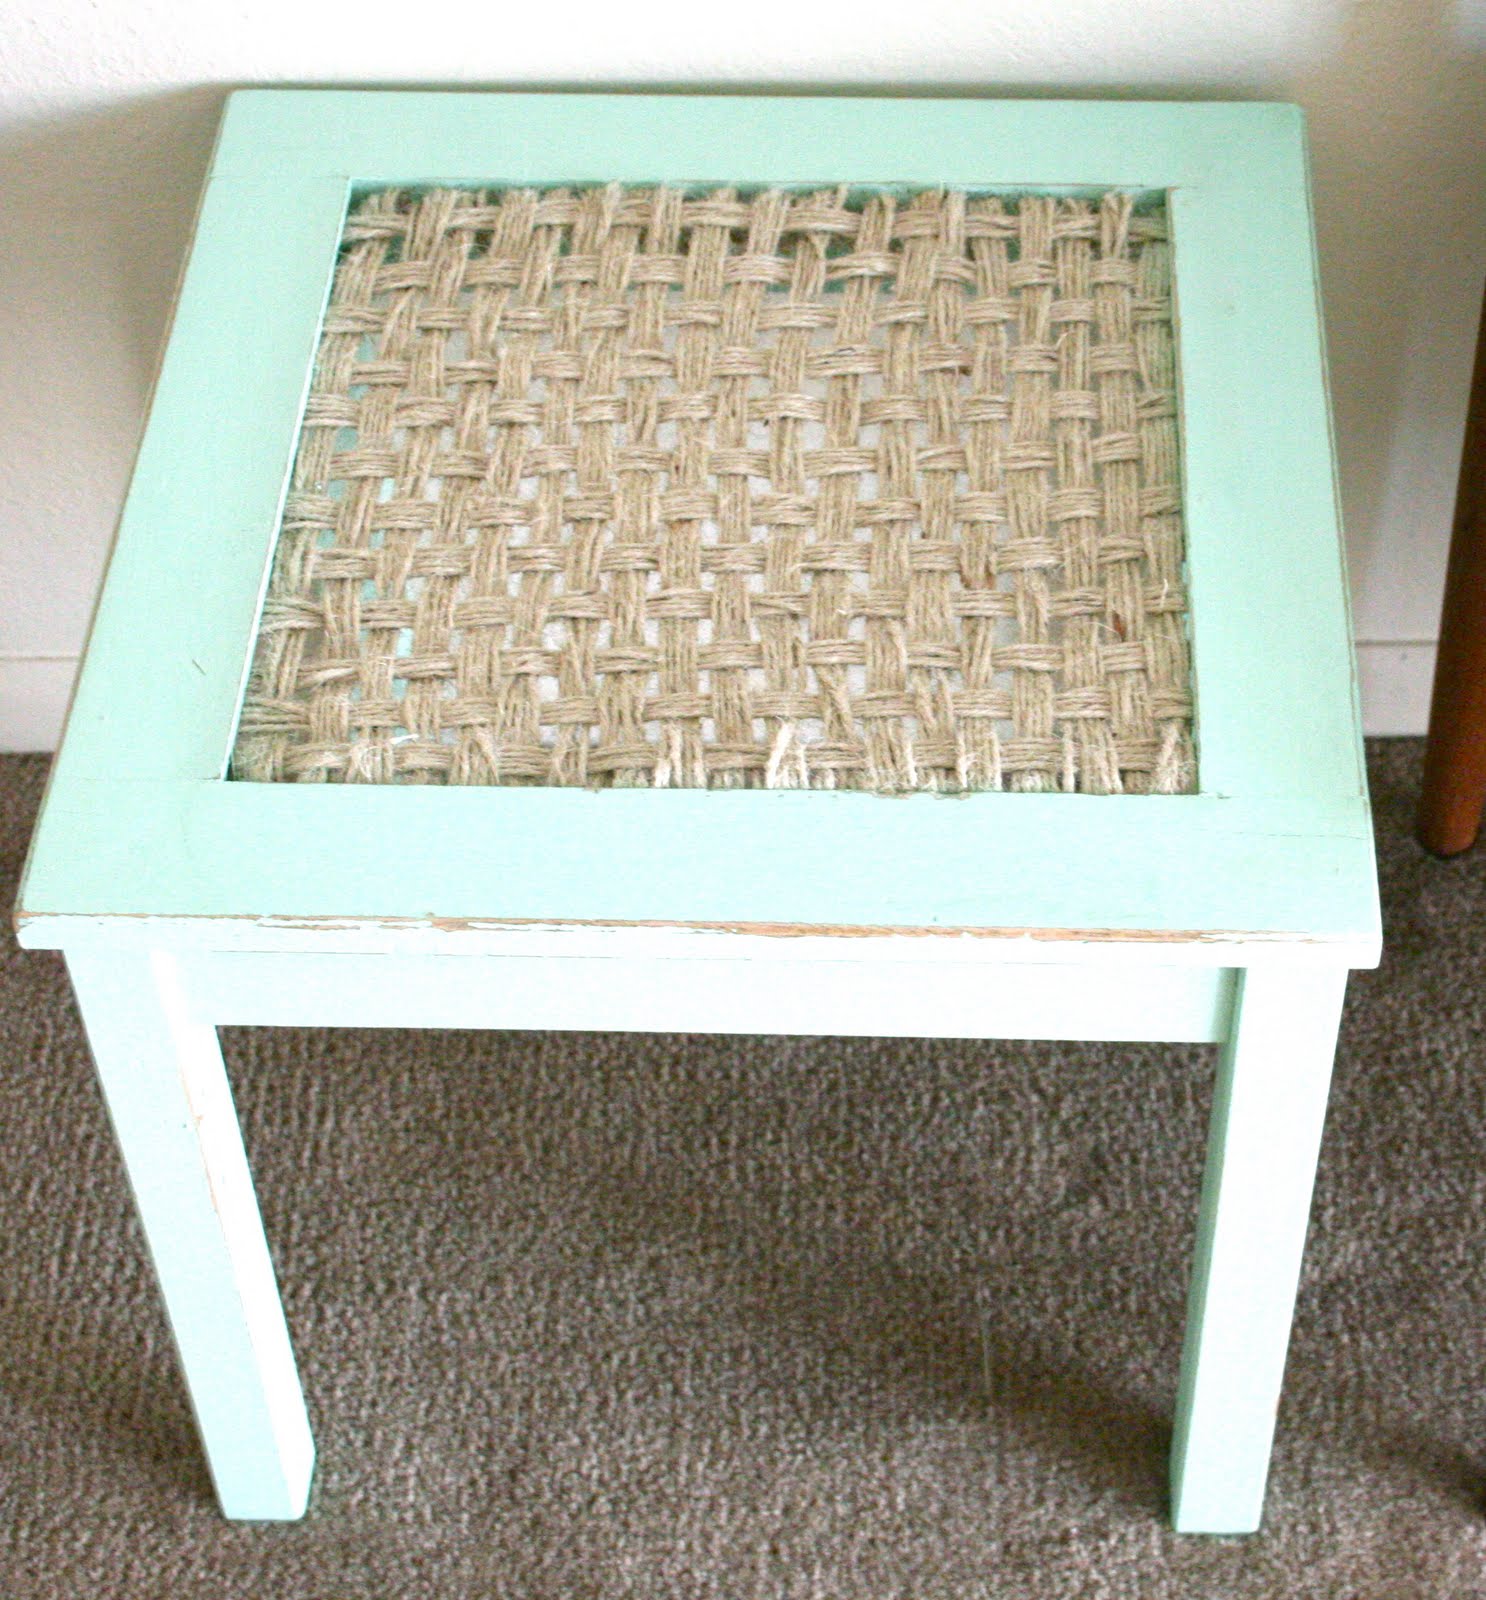
This little fella is another one of my roadside-rescue projects. I didn't let the fact that I was out jogging and the top of the table was completely missing stop me from snatching it up and taking it home!


I've been experimenting a lot lately with what I like to call "mixed-media furniture", so weaving a top for the end table made for great practice:) Add some sea-green paint and a bit of light distressing, and I ended up with an end table that would look right at home in a beach cottage.


And now for a before/after project that is still very much in the beginning stages. The last time you saw this half of my living room, it looked like this:


Well, I sold those chairs, and in their place we have this chair:


and this chair:


Step one was to sand the original finish off of the armchair. Time had not been good to it and it was a little rough-looking in places. I'm almost done with the sanding, then I'm going to stain it to match the chair above. The question, then, is what to do about the upholstery! I'd like to re-upholster them in matching fabric, or at least color-coordinated fabric.


Right now it's just covered in this red vintage table cloth, but I've narrowed my options for a more permanent upholstery job down to these three:


 A) Wool Blanket: Something stripey like a Hudson's Bay blanket, inspired by the chair above. The smaller chair could then be upholstered in the leftover blanket material, or in a solid fabric that matches one of the blanket's colors.


B) Neutral: This is the route I usually go with furniture, because I prefer to let the accents like pillows and throws "do the talking" (i.e. be colorful and bold). I have a lot of white linen fabric that looks similar in texture to the chair pictured above.


 C) Whimsical: I love this chair from anthropologie, and I found similar, Monet-inspired fabrics that I think would look really cool.


 It might be a little much to do both chairs in this fabric, so I'd probably just do the bigger chair in the Monet, and the smaller chair in a solid, color-coordinated fabric.


So should I go for A, B, or C?

vote! vote! vote!

Sunday, June 12

I went to Pat's today, and I thought I'd share a few things that I got while I was there:) I got this frame with the awful duck print in it, and an instructional book on the art of collage-making, which is full of adorable illustrations!


Like this little boat, which I put in the duck-print frame. Isn't it cute?


The best part about the collage book is that on the backside of every color illustration is the black and white instructional side, so I don't have to choose which illustrations to frame, I can frame them all if I want:)


These three below are my favorite.


My husband laughed when I pulled this big, dusty, bull-fighter print out of a pile of frames, but I think he's awesome!


And he only cost 50 cents! 


Friday, May 27

ootd: one outfit, three destinations

The Weekend Road Trip


Shirt: Vintage
Shorts: J. Crew
Belt: Vintage/came with the shirt
Shoes: Steve Madden

The Brunch With Friends


Cardigan: J. Crew
Belt: J. Crew
Flats: Forever21

The Country Club


Blazer: Di Vita
Belt: J. Crew
Shoes: H&M
Pearls: Vintage
Clutch: Boutique

Thursday, May 19

laundry, lamps, linen, and line drawings

First of all, thank you from the bottom of my hardwood-floor-loving heart for all of the helpful advice I received in the comments of this post! 


Option A (our current home) won the votes in a landslide, and I think we're actually going with the votes on this one. On Tuesday we measured all of our "must keep" furniture, like our sofa and our bed, then went to the house and marked out with tape how much actual space in the rooms our furniture would take up. We were willing to part with more than half of it, but even putting less than half of our furniture in there would still make for a VERY tight squeeze. Like, turn-sideways-and-shimmy-across-the-wall-to-get-into-bed tight. And hearing so many of you say what a frustration it is having to go to the laundry mat definitely got me re-thinking giving up having a washer and dryer at home. So, long story short, we're going to pass up on this little place and pray that something else equally charming, old, and hardwood-floored comes along. Only this time an extra bedroom and laundry would be nice:) I can't say I'm not a little sad to let go of the idea of moving into that place, though. It was just SO DARN CUTE!


In other news, I recently realized that I never posted about that lamp makeover I mentioned! Well, it didn't turn out that great anyway. I started with the turquoise and floral lamp you see above, which was already a makeover of the original lamp.


I painted the base white and re-covered the shade in ikat, but I'm sorry to say that my lampshade re-covering skills are um .... improvable. I couldn't help but laugh at myself when I got it all finished and realized how horribly lopsided the fabric is. Why is it so much harder to recover a lampshade than anything else?


I'm lazy and I don't want to waste any more fabric, so it's staying as-is for now. Another little project I did recently is the art above the bookshelf.


All you need is scissors, a pencil, a marker, card stock, 8x10 matted frames, and a computer to look up Picasso line drawings to copy, and you too can have your own little Picasso art gallery:) I even forged his signature on them so they'd look extra official.


And one more thing before I go! I've been intending to blog about this forever ... check out this gorgeous mid-century chair my parents bought me when my family came out to visit for Easter! Isn't it fabulous? I can't wait to get it all fixed up.


I think I'm going to have it recovered in some sturdy white linen, to coordinate with our sofa. I just love the look of wood and white furniture, accessorized with colorful throw pillows or blankets.


The stain and finish are pretty worn, so I think I'll strip it and stain it to match my other mid-century chair.


I think that's all for today! Jemima says "hi"  :)

Tuesday, April 26

1 dress + 2 sisters = craftiness


A while back my sister and I came up with a fun idea for a crafty project we could do together, even though we live on opposite coasts! My mother no longer wanted this pretty floral maxi dress, so we decided to cut it in half, right up the middle, and not tell each other what we were making with our half until the projects were completed!


Jemima used to have an adorable little shabby chic bed, but after she totally ignored it for about 2 years straight, we finally gave it away. Naturally, she soon after started wanting a bed of her very own, and began curling up into small, dog-bed-esque things like this box top, as if she were a poor, neglected, bed-less creature that just had to do the best she could with whatever she could find.


I remembered seeing this vintage suitcase dog bed over at Houzz, but I didn't think Jemima would like it being elevated, and I couldn't bring myself to disassemble and drill holes in a vintage suitcase, so I decided to make a simpler, power tool-free version.


I already had this guy re-lined and cleaned up at home, so I decided to use it for my doggy bed. Click here to see the before pictures!


Before I started working on the bed, I threw the fabric inside the suitcase and patted it so Jemima could try it out. I figured I'd see if she'd even sleep in it before I went to the trouble of making it.


Sure enough, she hopped right in and slept for over 2 hours, only moving to switch positions! She just loves tight spaces.


When she finally woke up, I spread the fabric out to start cutting. As you can see in the photo above, she was still a little groggy from her nap.


First I made a little pleated skirt that was long enough to cover three sides of the suitcase. I was determined to make this a no-sew project, so I just pinned the pleats in place, secured them with hot glue, then removed the pins.


Then I glued the pleated skirt to a square of fabric big enough to cover the bottom of the case.


She seems to prefer sleeping on mostly hard surfaces, so I went very light on the fluff.


I covered the fluff in a square of felt.


Next I glued down the top square of fabric. Obviously substituting hot glue for sewing isn't going to make for the most long-lasting cushion in the world, but I figure since she's so tiny it should hold up pretty well, and by the time it starts falling apart it will probably be dirty enough to need to be replaced anyway. 


I used a shoulder strap from the dress to spell out her name on the top. I pinned the strap down to make sure I had it centered properly, then hot-glued it in place and removed the pins.


I was going to glue a square of ribbon around the center where the square meets the pleated skirt, but I decided against it because all the ribbon I had on hand was too wide.


She likes to take her naps at the bottom of the stairs, so that's where I put her new bed. She loves it!


I'll let Lizzie do the talking on her blog when it comes to the details of her project, but I don't think she'll mind me spilling the beans and telling you all that she made an ADORABLE little stuffed elephant for our niece that is expected to arrive at the end of June:)  Lizzie is far, far more accomplished at sewing than her big sister! She also made a precious little blue and white striped elephant for our nephew Connor.


And speaking of Connor, look who came to see me last Thursday:) More on that later!