Showing posts with label food. Show all posts

Friday, July 22

I'm pinterested in showing you ....


a home with fabulous art and a great chair


I'm telling you, I just can't get enough of Pinterest! Follow me and don't forget to say hi so I can follow you back!

Thursday, May 5

biaggi's penne sardi - copycat recipe


A while back, while I was visiting my Mississippi family, we went to a restaurant called Biaggi's. I ordered the butternut squash ravioli, but by mistake they brought me the "penne sardi". Well, it was an awesome mistake, because it was the best pasta dish I think I've ever had, and I eat a LOT of pasta. I searched for copycat recipes online, but there were none to be found, so I experimented with my own. This doesn't taste exactly like the restaurant's, but it's pretty darn close! I don't eat meat, so I left the chicken out of my version. You carnivores out there will have to figure out how to copy the chicken part on your own, but I have to say ... it's delicious without the chicken!

Biaggi's Penne Sardi:
serves about 6


Start with the breadcrumbs. Tear 3 pieces of bread into bite-size pieces, then blend them lightly. You don't want them too fine or they'll just burn!


They should be similar to this texture.


These seasonings, plus salt and pepper, are what I used to flavor my breadcrumbs. You'll probably want to use lots of parsley, so make sure you have at least a tablespoon or so on hand.


Spread the crumbs out on a baking dish, and cook them at 200 for about 3 minutes at a time. Take them out, and mix them up thoroughly. The crumbs on the outside are going to cook faster than the middle ones, so you want to be careful to take them out and stir them every 3 minutes! Keep going until they are golden brown and crunchy. This shouldn't take more than about 10 minutes. Now set them aside and move on to the onions and mushrooms.


Take a large pan (a cast iron skillet works best) and melt about 3 tablespoons of butter in it. Slice one large yellow onion into very thin slices, and add one cup of sliced mushrooms. Sprinkle pretty heavily with salt, stir, add more salt, stir.


This part takes about 45 minutes, but it's worth it, I promise! Keep cooking the mushrooms and onions over VERY low heat until the onions go from white and stiff, to clear and flimsy, to brown and syrupy. Use the before and after pictures above as for reference of how much they should cook down! Now you can set that aside and move on to the sauce.

I sort of use this recipe, sort of, but with lots of modifications.
  • 2 1/2 cups heavy cream/ half and half
  • 1 cup butter (I know)
  • 1 1/4 cup shredded mozzarella cheese
  • 5 tablespoons grated parmesan cheese
  • 1 cup sun-dried tomatoes
  • salt and pepper to taste
Melt the butter and cream together in a large sauce pan, and bring almost to a boil, but not quite. Stir in the cheeses until they are melted, followed by the tomatoes.  Add salt and pepper to taste, set aside.


Now it's time for the pasta! Cook about a pound and a half of white penne pasta, then drain. My husband is the official rice and pasta cooker of the house, so I let him take over here. Drain the pasta, then dump it into a large bowl. Now throw in the sauce, caramelized mushrooms and onions, an extra half cup (or more, if you'd like) shredded mozzarella cheese, and stir it all up! Pour it into a large baking dish, and top it off with more shredded mozzarella and the breadcrumbs. You may want to spritz the breadcrumbs with Pam to make sure they stay crispy.


Bake it at 350 for about 20 minutes or so, checking once or twice to make sure the breadcrumbs aren't burning.


Enjoy!

Monday, January 31

I'm back and ready to blog!

As you may have noticed, I took a little week-long break from blogging. I hope it wasn't too painful a separation for you! LOL;) I have a lot to catch up on, so forgive me if this post is a bit all over the place!


You may remember my little friend Jigsaw, from a few posts back.


I am currently in the process of re-covering him in this print from vintage printable. Will it decrease the terrifying-ness that is my paper mache project? I don't know, but here's hoping! And speaking of vintage printable, does anyone know what happened to it? It seems to be down. I'm gonna cry myself to sleep if it turns out it's been taken down for good!


I have a funny pixie-cut related story for you guys. On Saturday afternoon my husband and I went to South Beach to chow down on some delicious fish tacos. You have to be 21 to get in, and when the guy was checking IDs he looked at mine, then looked at me and said "I gotta be honest, you look wayyy better with short hair". Which was nice of him to say, but sort of hilarious because of course I look better now, my driver's license picture is ATROCIOUS! Don't believe me?


AHHH!!!!! Told you.

 If anyone tries to tell me I'd look better with long hair, at least I know I can whip out my license and instantly change their mind! And if by chance this post is making you crave fish tacos, but you can't get them where you live, you can always tide yourself over by making these:)


In other news, the adorable Mina from Bohemian Vintage was kind enough to ask me to participate in her 10Corners feature! Click here to have a look:) Another feature I've been meaning to mention forever is my interview with my blog-buddy Alaina from Recycled Interiors. Click here to check that out! Thanks Mina and Alaina!


And finally, you all know how head-over-heels I am for this little guy ... well, he has a sibling on the way, and my sweet sister-in-law called me on Friday to tell me it's a GIRL! So excited to meet my first niece (on my family's side) and fall every bit as in love with her as I am with her big brother:)


So that's it for today, but I have lots of fun posts coming up this week, so don't be a stranger:)


Friday, August 20


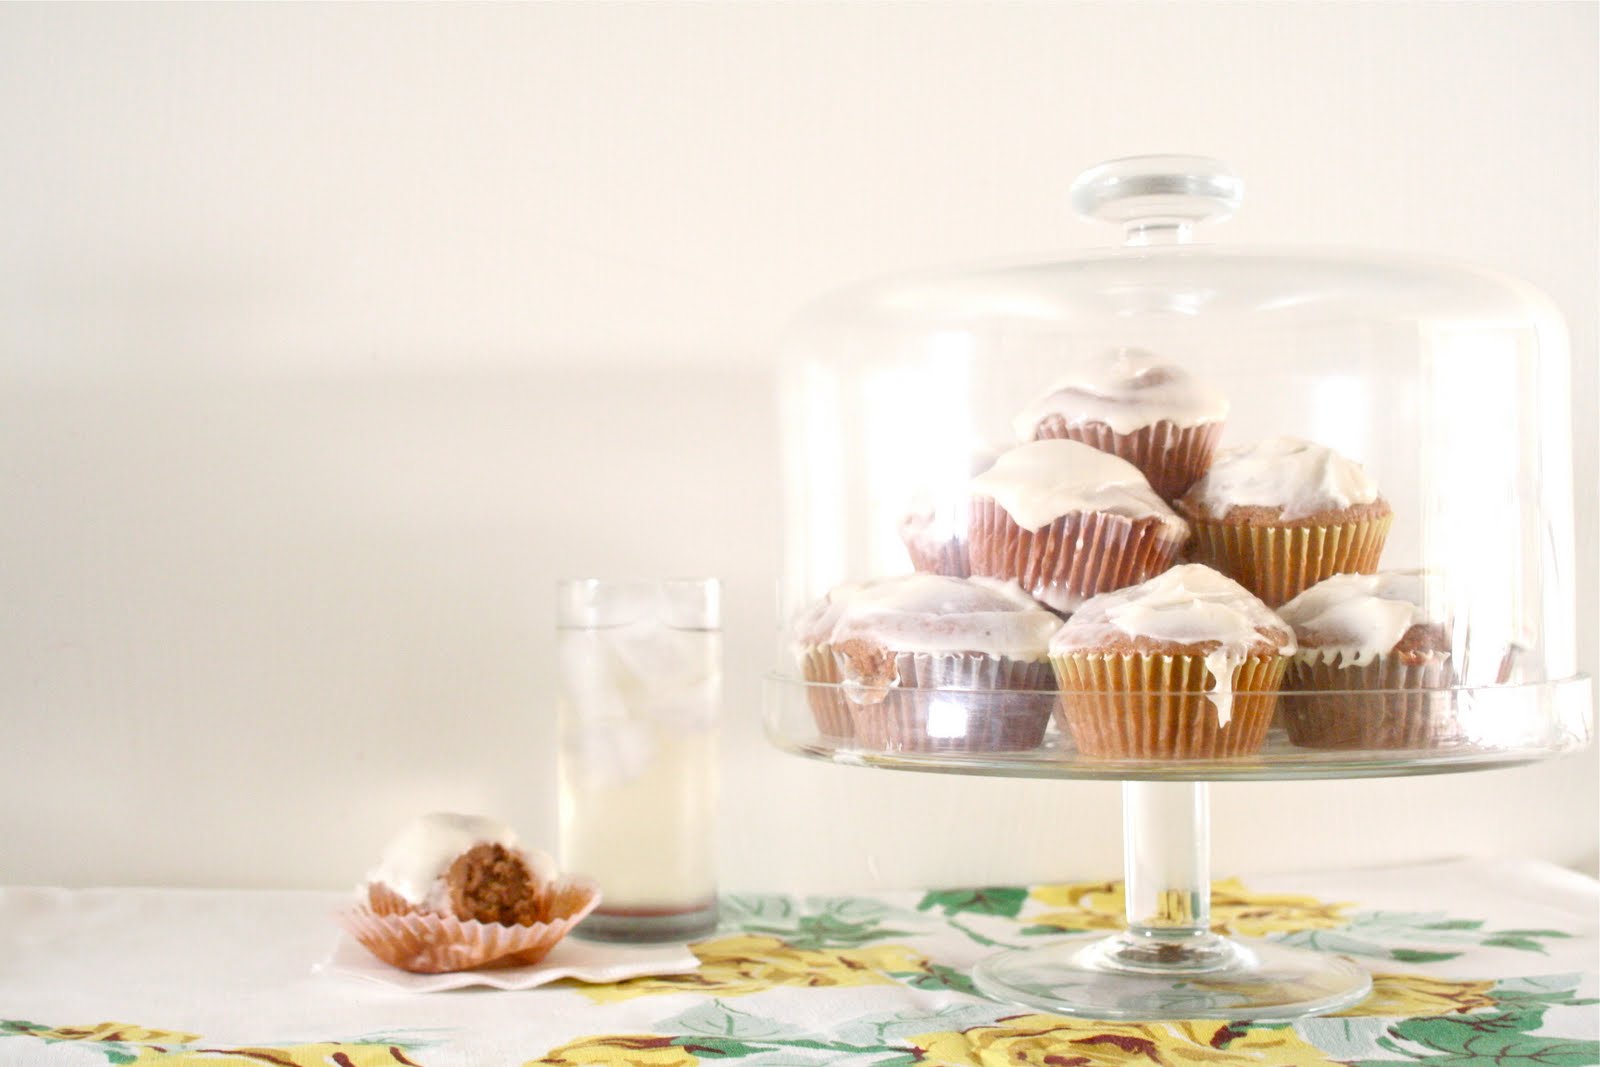
Today I channeled my inner Jillian and baked these cupcakes. Carrot cake cupcakes, to be precise. They may not be pretty, but they're very tasty. We have some new neighbors, so I'll probably take a few over to them. Very Bree Van de Kamp* of me, right?


I've made cupcakes plenty of times before, but this was my first time whipping up my own icing from scratch. Here's the very simple recipe, if you're in need of one:

Buttercream Icing
1/2 cup butter
3 cups powdered sugar
3 tablespoons milk
1 teaspoon vanilla

cream the butter, then mix in the other ingredients and you're done!


I realize this is sort of a strange addition to this post, but I worked hard on my hair and makeup for tonight and I'm so proud of it that I'm posting a picture (or two)! Because Jemima was just recovering from surgery during our wedding anniversary, we had to celebrate with dinner at home with her. Tonight's the night we're going out on the town for our "rain check", and I wanted to look extra cute! And if you're worried that I'm going to wear that shirt out to dinner, I'm not. It's a vintage silk shirt that I just wear while getting ready:) 

*If you're not familiar with Desperate Housewives characters, Bree is just like Martha Stewart, if Martha were presbyterian, Republican and a proud member of the NRA.

Have a great weekend, everyone!

Friday, May 21

fresh & easy pizza

We love pizza, but it can quickly become an expensive and fattening habit! I wanted to come up with a tasty, cheap version of one of my favorites - a margherita pizza - and I started making this about 6 months ago.


For the "crust", I just use flat bread! The Indian Flat Bread from Trader Joe's is great, as well as Tia Rosa Tortilla Bread, which is pretty easy to find at most major grocery stores. I buy parmesan that's been cut from the wheel, and it tastes SO GOOD. I never knew how delicious and unique the flavor of real parmesan is compared to the powdery stuff that comes in the green can, but wow ... HUGE difference!

For this blog post I pictured butter, because our olive oil was too big to photograph, but you can substitute the butter for olive oil, which is what I prefer to do.


Wash the basil leaves, then slice up the cheese and tomato. Here's a tip for slicing up the cheese: use a veggie slicer like this one! It's so much easier than cutting it with a knife.


Pour about 1/4 a cup of olive oil (or butter) in a sauce pan, and spoon in about 1 teaspoon of garlic. Let it simmer a little bit, then pour into a cup or bowl and set aside. DON'T wash the pan yet! Put the sliced tomatoes in and cook them down until they're soft, about 3 minutes if your pan is on low heat.

Spread the tomato sauce on the tortilla bread on the smooth side! Leave the bumpy side down because it will make it a little crispier. Top with the leaves, tomatoes, and cheese, then drizzle the olive oil/garlic around the edges of the "crust".

Cook at 350 for about 5 minutes, or until the cheese has melted.

Tuesday, May 11

unplugged: let the games begin!

In addition to my design blog, I also follow several hippie-ish, green-living blogs, and they're all talking about the same thing: unplugging! The idea intrigued me, and I wanted to give it a shot. These days we're all so very, very dependent on our electronics. We send emails, browse the web, watch our TiVo or a movie, then hop in bed ... after we check our email one last time, of course! Sadly it's just not possible to totally unplug. You have to have your phone and your computer to get by in the world, these days ... but there's really no reason that you have to use any of it at night when you could be spending time with family.


I mentioned the idea to my husband on Sunday, and the first thing he said was "how will I check my email?" ... we're very addicted to our email, haha. But after I explained it to him (you can check it up until dinner time), he was excited to try. We decided to start this week! Our agreement is that Monday - Thursday we will put the computers, phones, TV, DVD's, Roku, etc. away, right before dinner, and we'll stay unplugged for the rest of the evening.  Then we'll just do whatever people did for fun before the TV, cell phones and internet made their way into everyone's home!


It ended up being a lovely evening. We took our time cooking a delicious meal (baked salmon, steamed veggies and whole wheat pasta), we played Bananagrams, and we read aloud in our current book.


We even had time to fold some laundry, tidy up the house and go to bed a little earlier than usual! It was really great. We're already making plans for fun things to do while we're "unplugged" this week, and I'm especially excited about our plan for tonight. Stay tuned!


Dogs are always unplugged, so Jemima just chose to make a "fort" (her new favorite pastime) and hit the hay early.

Have you ever tried anything similar? Feel free to join us!

Friday, May 7

pretty glasses

When I saw this post on Young House Love, it reminded me that I never posted about the pretty new glasses that my sweet mama got me to brighten up our cupboards!


These came from World Market, and I just love the tall, slender shape.


Aren't they so pretty and colorful?


These came from Target, and I'm pretty sure they should still have them at your local Target! They're the perfect size for a nice big glass of iced tea:)


Luckily for us, Jemima was available for a brief photo shoot, and even demonstrated her different "looks" for us.

concerned ...

sincere ...

and hopeful.

Monday, February 1

a bar cart brunch

Before:


Here's one last look at that dusty diamond that was very much in the rough.

After:


And here's my bright and cheery after.


It's all decked out as a service cart for a self-serve breakfast buffet.


What's more fabulous than orange juice in a wine glass? For this little set-up, I put out milk in a carafe, square white plates by TAG, silverware, colorful napkins, and put pink serving utensils in the shaker. I also put a napkin down on the serving tray, and filled it up with juice and wine glasses.

Happy brunching!

Sunday, January 31

good things come in small servings

I first saw these adorable little single-serving pies on the lovely blog Content in a Cottage, but it originally comes from the blog Our Best Bites. Aren't they so cute?


They'd be so cute for a little girl's birthday party (especially if, like me, she doesn't care for birthday cake), a book club meeting, or given as a gift with a grosgrain ribbon tied around the jar. The second one looks simply delicious! Click here for the recipe and instructions. 

Wednesday, January 6

an afternoon at the beach

I've never been to a New England clam bake, but I'd really like to someday. If I did ... this is what I'd wear. Sure, it's a little early (OK, maybe it's WAY early) for a spring/summer inspiration board, but it's my blog and I'll jump the gun if I want to!
New England Clam Bake


Items in this set:
Dress $168
Sunglasses - $176
Shoes - $90

Tuesday, December 22

a tasty treat


My mama made me this amazing soup while I was visiting last week, and I thought I would share it with you:) She got the recipe from my Aunt Becky, and let me tell you, it's amazing! Don't be put off by the fact that it's pumpkin in a savory dish ... it's really, really good.

ingredients:
1/2 lb fresh mushrooms - chopped
1/2 cup onion - chopped
1-4 tablespoons butter
1/2 - 1 tablespoon curry powder
3 cups chicken broth
1 can (15 oz.) pumpkin
1 can (12 oz.) evaporated milk
1 - 2 tablespoons honey
1/2 teaspoon salt
1/4 teaspoon pepper
1/4 teaspoon ground nutmeg


  • In a large pot, saute the mushrooms, onion and butter until tender. Stir in the flour and curry powder until blended. Add a little more flour until thickened.
  • Gradually add the broth, stirring constantly over low heat. Let it boil slightly and keep stirring until thickened.
  • Add the pumpkin, milk, honey, salt, pepper and nutmeg. Heat through, scraping bottom of the pot to keep it from sticking.
  • Optional: garnish servings with sour cream and chives or green onions.
Bon appetit!

Thursday, November 19

french onion soup

image courtesy of Sony Pictures

French Onion Soup is something that was introduced to me by my mother. It's a wonder I ever tried it in the first place, I was probably about 9 years old, and I can't imagine many nine-year-olds wanting to try a soup with bread and cheese inside, but luckily I've always been a fairly adventurous eater. I wanted to learn to make my own after being inspired by the complicated French dishes in Julie & Julia, so I set out to learn how to make this soup. It is definitely more complicated than what I usually cook, but I promise that it's not as hard as it looks, and it really is VERY hard to mess up. And since it's not really my recipe (although I did make some modifications that I believe improved it), I can say without bias that it is the BEST ... by FAR the best French Onion Soup I've ever had!


The recipe is divided into three parts: The broth, the onions, and the bread/cheese topping.

The Broth:


1 32oz. carton of Wolfgang Puck's Organic Beef Flavored Broth: I have tried one or two other types of broth and it didn't taste at all as good as it did when I used ole Wolfgang's, so do try to get this specific type if at all possible. They have it at Ralph's, or "Kroger" for those in the south.
1/3 cup of dry white wine. I use "two buck Chuck" Chardonnay and it works just fine.
one bay leaf
hearty pinch of dried parsely flakes

a few sprinkes of ground thyme
1/2 tablespoon of white vinegar
1/2 tablespoon of Worcestershire sauce
1/2 teaspoon of minced garlic


Simply dump all of these ingredients into a medium-sized pot and cook over low to medium heat for at least 20 minutes. It takes about 45 minutes to finish the recipe out from here, and I usually just let it cook the entire time, stirring occasionally.

The Onions:

This is the part that will really make you feel like quite the Julia Child in training ... caramelizing the onions. If you don't know about the heaven that is caramelized onions, you are in for a treat.

4 small yellow onions, or 3 large yellow onions: slice these as thinly as you can. This will save you lots of cooking-down time later!
4 tablespoons of butter (I never said it was a healthy recipe)
Salt

After you've sliced up your onions, you may want to measure to make sure you have enough. The sliced onions should be about 1 1/2 quarts. Put the butter in a large pan, preferably cast-iron if you have one, and sprinkle with salt. It's important to add the salt now because it helps create the chemical reaction that turns the onions into their syrupy texture, or so I read. Once the butter is melted, add the onions, and stir them in so that they are all covered in butter on both sides.


It should look like this picture above. Now comes the tedious part. You have to stand there and stir ... and stir ... and stir ... for about 30 to 45 minutes. If I'm cooking by myself I usually bring my laptop into the kitchen with me and watch a movie while I stir. It helps pass the time! In fact, the first time I made this, I brought my laptop to the kitchen and turned on The Holiday. I paused it when I was done cooking, and the next time I made this soup I watched some more. Now it's become my official French Onion Soup-Making movie. I still have about 30 minutes left to watch, so I guess I need to make this again soon so I can finish it:) I'll probably never be able to watch that movie again without being afflicted with a terrible craving for caramelized onions.

Eventually the onions will cook down to a gooey, syrupy texture. I sprinkle them with salt every 10 minutes or so and that seems to speed up the process. Just do a taste test before you add more salt to make sure they aren't too salty. You'll be tempted to turn up the heat on the stove to get it over with, but don't! Once they burn or get slightly tough, they can't caramelize anymore. Just be patient and cook over a low to medium heat.


It may feel like it's never going to happen, but eventually they will look like this. And yes, that's all that's left of them! I didn't take any onions out before taking this picture:) You can click on the picture to get a closer look of what they should end up looking like.

The Cheese and Bread:

Several slices of French Bread, or a Sour Dough Baguette
Gruyere Cheese

Turn the heat off of your onions and the broth, and put a lid on the broth to keep it warm. Slice up the bread so that it will fit into your ramekin (no thicker than an inch), then pop it in the oven at 350 degrees for about 7 minutes. Slice up the cheese into thin slices.


Now it's time to put it all together! Put one or two spoonfuls of the onions into the bottom of the ramekin, pour the broth over it until it's about 2/3 full, then put the slices of bread on top of that. Drape the cheese over the bread so that it covers the top, then pop into the broiler for 5 minutes. The cheese should be melted and bubbling when it's done. Once you take it out of the broiler, sprinkle the top with paprika, and serve! It's seriously delicious, and you can serve it with all that Chardonnay you have left over:)

Don't worry about coming up with side dishes to accompany it, this soup is extremely filling, even to my 6'2'' husband. It should serve about 4 people, but it can be doubled easily.


Bon appetit!